
Login to the Payments Portal click here to log in
On the left hand menu bar click on Payment Link and then Create Link

You will need to fill out the items marked with an asterisk under Transaction Details
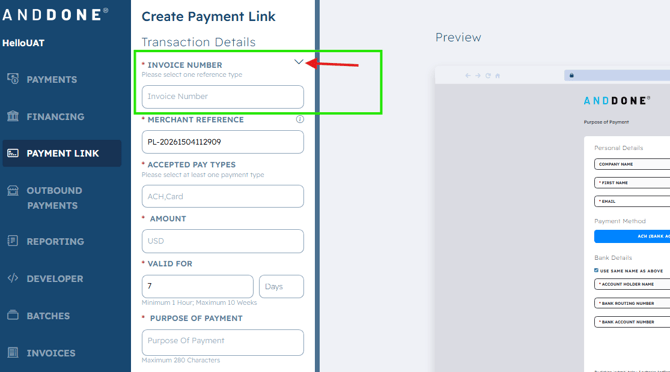
The first section- is a drop-down menu- where you will need to select one of the reference types: Account Number, Policy Number, Quote ID, or Other.

Our example selected is Invoice Number

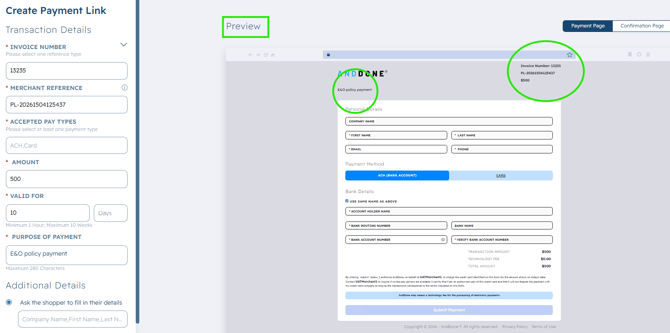
After entering the Invoice Number, you need to enter the payment amount.
Next enter how long the payment link should be valid. Minimum 1 hour, Maximum of 10 weeks
Next enter the Purpose of Payment (indicates to your shopper what the payment is for)
Use the Preview screen to see what shoppers will receive when they click the payment link.
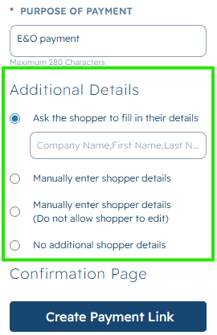
Under Additional Details, by default the Shopper will be asked to fill in their own details.
You also have the option to fill in the Shopper yourself or to waive additional shopper details.
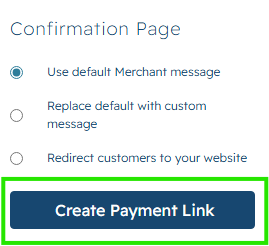
Next- select your Confirmation Page preferences: default message, a custom message, or to redirect to your website.

Once you have confirmed all details, you will click on Create Payment Link.
Then simply Copy & paste to send the payment link to your shopper!

If you need assistance or have any further questions, please click here to contact our support team.