How do I create and customize a payment link?
Creating a payment link allows your customer to easily pay by credit card or ACH through a simple, customizable, single-use link.
- After successfully logging in to the Portal (click here to reach the login page), locate the "Payment Link" option on the left side navigation bar. After clicking "Payment Link," a drop-down menu will open with the options "Create Link" and "View Links."

- To open the Create Payment Link view, select "Create Link" from the dropdown menu.

- Once in the create payment link view, you can select a reference type from the dropdown menu. This reference type will help you categorize and organize your payment links for easy tracking and management. You can choose from various options such as Account Number, Invoice Number, Quote ID, Policy Number, or Other.

- Once you have selected a reference type, such as Account Number, from the dropdown menu you will need to enter a corresponding reference information.

- After you have entered a reference number, select which payment types you will accept for the payment. You can choose between ACH or Card payments. ACH payments are electronic transfers from one bank account to another, which are commonly used for direct deposits and bill payments. Card payments refer to payments made using credit or debit cards.

- Under "Amount", enter the amount required for the payment. When entering the amount for the payment, it is important to input the exact sum that needs to be paid. Be sure to double-check the amount to avoid any discrepancies and ensure that the payment is processed accurately and efficiently.

- When entering the validity period, you have the flexibility to choose the duration for which the payment link will remain active. For instance, in this example, the validity period is set to 7 days. You can select from different time intervals, such as weeks, days, or even hours, depending on your specific requirements.

- Next, you can enter the purpose for the payment. If the payment is for a specific invoice or bill, you can mention the invoice or bill number. Including relevant details in the purpose of the payment will ensure that the shopper knows exactly what the payment is for.

- Under additional details, you can customize the information you collect from the shopper when they make payments. You can ask the shopper to fill in personal information, such as their name, email, and phone number. Alternatively, you can manually enter the shopper details or waive additional information.

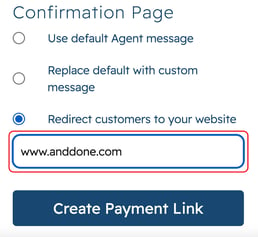
- Under the confirmation page, you can choose to use the default merchant message or you replace the default message with a custom message of your choice. In your custom message, you can provide more detailed instructions, include important information, or add a personal touch to enhance the shopper's experience. Lastly, you can redirect the shopper to your website after they have completed the payment.


If you need assistance or have any further questions, please click here to contact our support team.
